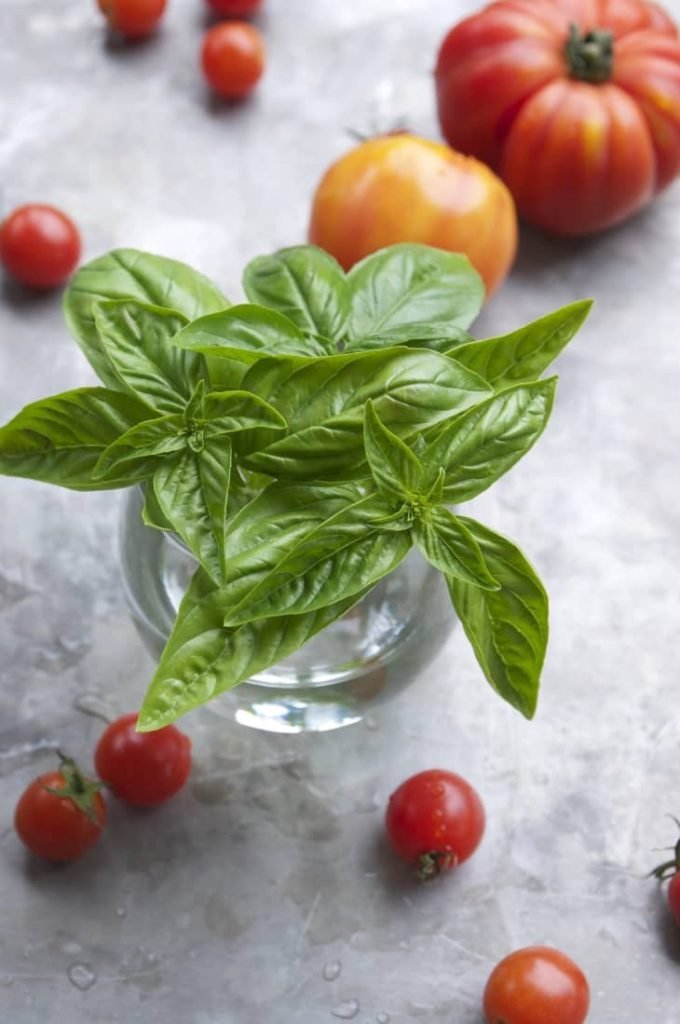
How to Care for Sweet Basil

Sweet Basil

Growing Sweet Basil

Parsley and cilantro might be high-ranking contestants when it comes to the most commonly grown herb, but sweet basil almost always steals the top spot! There’s a good reason for it, too. It is a tender, fragrant, and flavorful herb that is a prized addition to many cuisines. If you’ve never planted this popular garden herb, then there couldn’t be a better time than now! In this gardening guide, we’ll walk through the basics of how to care for this plant. Pesto, bruschetta, and margarita pizzas are right around the corner once you’ve mastered the easy art of how to care for this herb.

Basic Necessities

When it comes to growing sweet basil, there’s no “green thumb” required in order to be successful! In fact, you don’t even have to have any previous gardening experience to grow a bountiful crop. As long as you keep the following necessities at hand, you’ll always have plenty of basil to go around. Here are some basic tips to grow sweet basil.

  • Full Sun – As far as this basil is concerned, the more sunlight, the better! Although basil will tolerate a slight degree of partial shade, it will do best when grown in an area that receives at least 6-8 hours of full sun daily. For basil that is to be grown indoors, aim for at least 30 watts of full spectrum lighting for each plant. Indoor plants will need more light than outdoor plants, so plan on providing at least 10-12 hours of uninterrupted light.
  • Well Draining & Fertile Soil – Although sweet basil could be grown in less than ideal soils, you’ll find that maximum growth and plant health will be achieved in fertile soils. Not only does the ideal soil contain a wealth of composted organics, it will also provide plenty of drainage. For basil that will be planted in the ground, prepare garden beds a month in advance by working compost into the topsoil. Container basil plants will thrive with a high quality organic potting soil that is amended with perlite for drainage.

Grow Sweet Basil from Seeds

While you could go to the store and purchase a plant, the best way to start your season is by growing basil from seeds. Not only will you be able to control ow your seedlings are looked after, you’ll save yourself the headache of over-planted containers of basil at the local garden center. Here’s a look at how to plant and grow sweet basil seeds:

  1. Begin planting sweet basil seeds 4-6 weeks before the date of the average last frost in your area.
  2. Fill seedling trays with fine potting soil or seedling mix.
  3. Place 2-3 seeds per seedling container. Cover the seeds with just the slightest amount of soil. The seeds need some light to germinate, but also need the moisture from the soil covering them!
  4. Water the seeds well, being careful not to flood the soil.
  5. Place in a brightly lit south facing windowsill, or allow to sit under artificial grow lights. Maintaining consistent moisture, your seeds should begin to sprout in 6-10 days.

Quick Guide for Growing Basil

4-6 Weeks Before the Average Last Frost DateThe Week of the Average Last Frost DateWeek After Average Last Frost Date
Begin sowing sweet basil seeds indoors.Harden off the basil plants.Transplant basil plants outdoors permanently.

Thinning, Transplanting, and Growing

Provided you had successful seed germination, there should be at least a couple of young basil seedlings per cup. Continue to provide moisture and let them grow until they’ve reached a size where two sets of true leaves are present. At this time, gently pull or cut weak plants at the soil line in each cup. Thin so that only the strongest basil seedling remains in each seed cup.

  1. Once the sweet basil seedlings have been thinned, return to your regular water and lighting regimen for the next couple of days before transplanting. This short resting time will provide the basil seedlings a recovery period from any root damage that may have been caused during thinning.
  2. At this point, the basil seedlings may be transplanted into a container double the original size.
  3. Continue to house them indoors until the week of the average last frost arrives. At such time, the plants may begin the process of hardening off.
  4. After completion of hardening off, the sweet basil plants may be permanently planted into their final location or container.
  5. In its final location, sweet basil will need little maintenance. Just water and weed as needed. Your basil will appreciate a soil that is kept consistently moist, but never waterlogged. A good tip is to water only once the top 1.5 inches of soil have become dry.

Harvesting

Sweet basil leaves may be harvested any time throughout the season, and should actually be done so quite often to promote new growth. To harvest the leaves, pinch off new growth at the nodes. Pinching is preferred over cutting with scissors as it causes less stress to the plants. In either case, be sure to remove growth and leaves as close to the stem as possible. This good practice will reduce the potential for disease and keep plants healthy for continued production. At the end of the season, basil will begin to flower. The plants can be left to complete flowering for seed collection, or the flowers removed for continued leaf production. We highly recommend pruning the flowers!

Final Word

Caring for sweet basil is like riding a bicycle! Once you’ve learned the process, you’ll never forget it! Realizing that there’s a bunch of gardeners well versed in growing this herb, I’d like to welcome you to share any unique tips or tricks that have been successful for you. Thanks for reading, and happy gardening!

If you enjoyed this article, you’ll for sure want to have a look through these other great gardening guides.

How to Care for Rosemary Plants

Rosemary

There are four common ways to keep your rosemary plants healthy and thriving.

  1. Monitor for pests and diseases. Pests such as aphids, spittlebugs, whiteflies, and red spider mites are all attracted to rosemary and can cause its foliage to wilt. Inspect your plant frequently, and if pests are present, use insecticidal soap to deter them. Root rot is a disease that often plagues rosemary due to overwatering, so make sure your soil dries out in between waterings. Indoor rosemary is especially susceptible to mold and powdery mildew due to a lack of good air circulation. To improve air circulation indoors, run a fan near your plants.
  2. Prune to encourage new growth. Use pruning shears to trim away any dead or damaged shoots and flowers. Prune in spring or early summer so there’s plenty of sunlight to boost the production of new foliage.
  3. Harvest just before blooming. Rosemary oils are at their flavor peak right before the plant blooms. When harvesting rosemary, cut off the desired amount of sprigs and hang them upside down to dry in a cool, dark place. Once dry, strip the sprigs of their needles by pulling them between your pinched fingertips. Make sure to store the needles whole to maintain their flavor, and only chop them once you’re ready to use them in a meal.
  4. Plant with the proper companions. Rosemary is a companion plant to many vegetables including broccoli, cauliflower, cabbage, beans, and parsnips

How to Grow Rosemary From Seed in 7 Simple Steps

Rosemary

To give rosemary seeds their best chance at thriving, it’s best to start growing rosemary indoors. Fortunately, for those living in the tropical areas (like Singapore), you are able to grow rosemary anytime of the year. For others, since rosemary seeds are slow to germinate and grow, start them three to six months prior to growing season. Rosemary seed germination rates can be as low as 30 percent at times, so it’s best to start more seeds than you expect to plant. Our premium Potter Rosemary seeds are perfect for you.

  1. Choose a container. You can use small pots or a ziplock bag, but your best choice is to purchase a seed-starting tray with a plastic humidity dome.
  2. Prepare a seed-starting mix. Ensure that the soil you use has good drainage. You can create your own mix with equal parts perlite and peat moss or purchase a sterile, soilless seed-starting mix. Add some water to moisten the mix before adding it to your container. Otherwise, place your seeds onto a wet tissue and seal them inside a ziplock bag.
  3. Add the rosemary seeds. Sprinkle three to four seeds on top of the seed-starting mix. Cover the seeds with a small amount of mix, but not so much that they don’t get sunlight. Rosemary seeds require light to germinate!
  4. Lightly water, then cover the container. Mist the seeds with water using a spray bottle, making sure the surface is moist but not sopping wet. This helps settle the seeds into the mix. Cover the container with the plastic dome or plastic wrap.
  5. Store in a sunny, warm location until germination. Place the seed-starting tray / ziplock bag somewhere that receives plenty of direct sunlight. A heat mat and an indoor full-spectrum light can be used if you’re unable to find a warm, sunny area. If the surface of the seed-starting mix appears dry, remove the plastic cover and lightly mist with water until moist. The germination process typically takes two to four weeks.
  6. Once seedlings appear, remove the plastic cover. When the rosemary seedlings emerge from the soil, place the seed-starting tray in a shallow water tray. Water will seep up into the soil through the container’s drainage holes. Keep the seedlings in direct light.
  7. Transplant the seedlings. Once seedlings are three to six inches tall, transplant them outdoors. Plant rosemary seedlings in compost-rich soil with good drainage. Choose a location where they receive six to eight hours of direct sunlight each day. You can transplant your rosemary seedlings into a garden bed or, if you want to bring the plants inside during cold winters, a pot.

Source: https://www.masterclass.com/articles/how-to-grow-and-care-for-rosemary#how-to-grow-rosemary-from-seed-in-7-steps

How to Grow Rosemary From a Cutting in 6 Steps

  1. Use sharp scissors to take cuttings. Find a mature rosemary plant and snip the stem five to six inches from the tip, making sure your cuttings come from the soft, flexible new branches. Cut extra stems as backups in case some fail to grow.
  2. Remove the lower leaves. Delicately strip off the needles from the bottom two-thirds of the cutting.
  3. Place cuttings in a jar of water. Move the jar to a warm area that receives indirect sunlight. Every two to three days, replace the old water with fresh water. Root growth should occur within a few weeks, but it could take longer in cooler temperatures. If any cuttings shed needles and turn brown, that means those cuttings didn’t survive, and you can stop waiting for their roots to grow. When roots develop around the base of healthy cuttings, they’re ready to be planted.
  4. Plant each stem cutting in a small container. A sandy soil mix with good drainage is ideal. When planting, avoid damaging the roots by carefully placing each cutting into a three-inch hole in the potting soil. Gently fill in the hole with soil, and water enough to moisten the soil.
  5. Care for the potted rosemary plants. Make sure each plant receives indirect light, and water them whenever the surface soil dries out. Once you notice new growth, give the cutting a gentle tug; if you feel resistance, that means it has rooted and is ready for transplanting.
  6. Transplant rosemary outdoors. Move your rosemary plants to a larger container or your garden bed. Place them into compost-rich soil with good drainage. Choose a location where they receive six to eight hours of direct sunlight a day.

Source: https://www.masterclass.com/articles/how-to-grow-and-care-for-rosemary#how-to-grow-rosemary-from-a-cutting-in-6-steps

How to Grow Coriander Cilantro from Seeds

Grow Coriander from Seeds

Coriander Cilantro has a long history of being used as a digestive aid and used as a culinary spice across the world. Not only does it act as an anti-food poisoning agent, it also adds colour and fresh flavour to your food. With simple techniques, coriander can be grown in the comfort of a balcony next to other herbs or plants. The numerous benefits of this herb make it our perfect pick to grow at home and share with friends and family!

Coriander herb has bright green leaves and flat and thin stem. It has a pungent smell, similar to onions when fresh and lighter smell once dried. Coriander leaves make a showy display with its bright green leaves and little flowers. In the garden, the herb grows brilliant next to basil.

Coriander herb can be grown indoors under a wide range of climatic conditions. However, hot weather during the summer months causes coriander to bolt quickly and reduces foliage development. A coriander crop will mature in 40 to 45 days. It is often used as a rotation crop. Some growers double-crop in a given year.

With that said, let’s see how you can grow coriander from seeds!

How to plant Coriander herb

Growing coriander at home is the best way to have ready access to this fresh herb. You can buy pure, heirloom and non-GMO coriander seeds online here. Sow coriander seeds indoors in late winter or early spring. For a flavoursome and lush, leafy coriander crop, follow the following simple steps as you plant the herb.

Step 1:

Pick a spot for your container that exposes the plant to run for at least four to five hours. Prefer exposing the plant to morning sun as it enjoys a lot of light but not too much heat.

Pre-soak the seeds overnight. Space the seeds 3 to 4 inches apart while sowing in the container. You can also sprout the seeds before sowing.

Coriander crop thrives well in temperatures between 17° to 27°C. Coriander is best sown directly in pots rather than growing them in seed trays and then transplanting the sprouts.

Step 2:

You can grow coriander in full sun and well-drained soil with a pH of 6.2 to 6.8. Sow the coriander seeds about half to one inch deep in the soil. Space the seeds at a gap of approximately 6 inches. Press the soil over the seeds and cover with the half-inch layer of fine mulch. Water thoroughly.

Step 3:

Water the plants in dry periods. Be sure to not over-water the plant to avoid root rot. Good soil drainage is essential to ensure healthy root health as coriander has deep taproots.

Step 4:

Germination of coriander takes up to 2-3 weeks. Remember to thin young plants to 20 cm apart to allow them to grow to their full size. To extend the coriander harvest, regularly snip soft stems, rotating the plant while you harvest.

How to Care for Coriander

If you want to grow coriander, do note that coriander prefers cool weather similar to spinach and lettuce alike. It can be grown in partial sun as the herb does not demand full soon.

  • Avoid transplanting or repotting the germinated seeds and prefer starting from the seeds straight. This will help you avoid bolting.
  • The key to growing healthy coriander herb is regular and steady watering. Remember to mulch to keep the soil surface cool.
  • For a steady supply, we suggest planting small patches every 2-3 weeks throughout the growing season.

Harvesting Coriander Herb

Coriander can be harvested when the plant has become six inches tall. At this height, the leaves of the herb will be tender and least bitter. The stems tend to be more pungent as compared to the leaves. Cut the gentle stems at soil level.